FROM BREAD TO CHOCOLATE BROWNIES - ALL THINGS INTERESTING
The perfect scone recipe
I have always wanted the perfect scone recipe! One of those that you whip up on lazy weekend mornings, one that can have some extra’s added to them, or just be plain and have butter and jam on and taste perfect!
I also wanted it to be a baking mix, but then, I wasn’t so sure! I mean, do we need a scone baking mix? It’s one of those things, like do we need another cake mix baking mix? I actualy don’t know. I still don’t know, so I figured I’d share my recipe with you and realy hope you use it!
It’s a little bit long, but honestly, it’s not hard, I get my kids involved in most of the baking, so there you have it, if they can help, then realy you can make it!
It’s made with a handful of pantry staples, loaded with some of your favorite mix ins, or leave it as is! But it’s buttery and flaky all at the same time and realy is the perfect breakfast or tea time snack!
The pantry goods you will need are….
Flour
Baking Powder
Sugar
Heavy Cream or Whipping cream
Egg
Salt
Butter ( cold)
Vanilla (optional)
Dried Fruit ( optional)
Choc Chips (optional)
Blueberries ( optional)
There are a few optional add ins, if you don’t want/have any don’t use them, these are great scones plain!
Baking Sheet
Baking Paper
Mixing Bowls
Fork / Pastry Cutter
Knife
Realy is pretty much everything you will have already!
Let’s get started making your scones!
INGREDIENTS
2 1/2 Cups Flour
1/4 Sugar
2 1/2 teaspoon baking powder
1/3 cup COLD butter
3/4 heavy cream or whipping cream
1 egg
OPTIONAL
1/2 cup dried add ins / mix in
1 teaspoon vanilla extract
Preheat y our oven to 200C and line your baking sheet with the baking paper
In a large bowl, mix together your dry ingredients, flour, sugar, baking powder and salt.
Grate/cut your butter into pieces roughly pea size and if using, add in your add ins. Add this all to the bowl with your dry ingredients. Give it a quick mix.
In a small bowl whisk your egg, your heavy/whipping cream and vanilla. Slowly add this to your dry mixture and using a fork combine this until you have a shaggy clumpy doughy mixture. Turn it out onto a floured surface and press into a 2cm ish high square. Don’t squish it all tightly together, it needs to be loose and shaggy. Cut this dough in half and stack them ontop of each other. Press them down together, so they form one square or round 2cm high. Now you can decide what form you want your scones. I went for round cut into “pizza slices”. If you want traditional round forms, cut them out with a cookie cutter. Or if your looking for squares use a knife and cut them out. When using up your “leftover” dont knead/squish the layers, this is what gives it the flaky, fluffy texture. I realy do recommend you your your shapes so you don’t have any leftovers!
Place scones onto your baking mix and about 2cm apart. Brush each scones with some more heavy cream and sprinkle with some extra sugar! FREEZE them for 15 minutes, this helps your butter stay put!
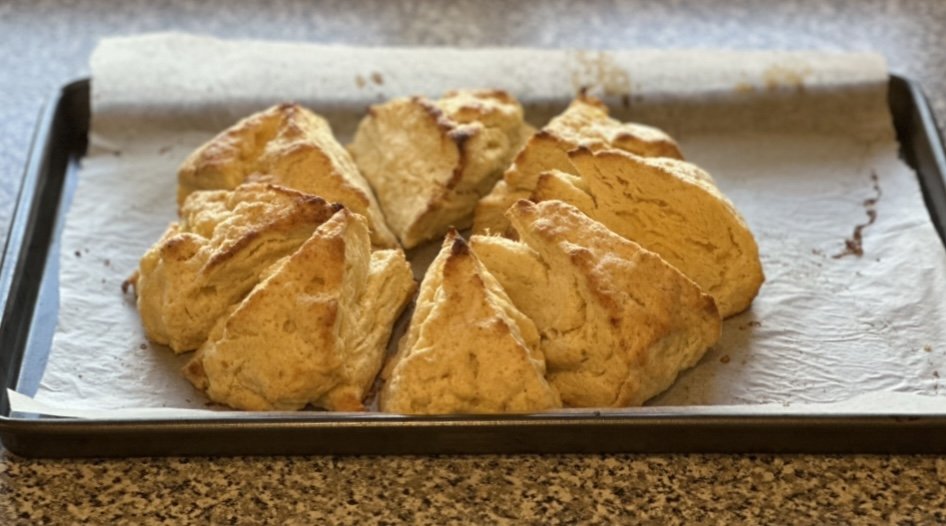
Remove from the freezer and pop directly into the oven for 12-15 minutes! Depending on your size of the scones you cut! Mine, as per picture went 15 minutes!
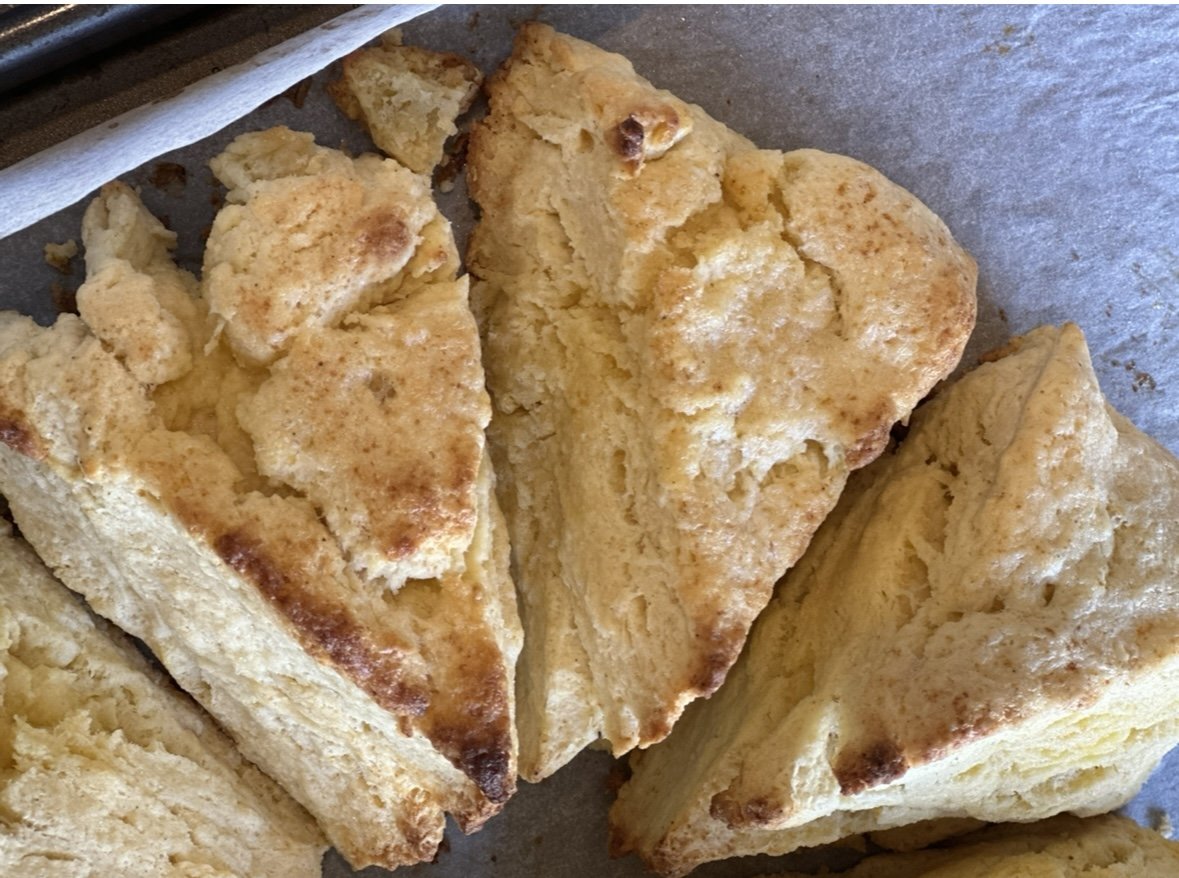
They are done when the have puffed up, the tops are a lovely golden colour! IF they are turning more brown than golden add a piece of tin foil to the top and bake for the remaining time!
These are best eaten on the same day, and are absolutely fine when warmed up for the next 2-3 days! Keep them in a airtight container!
TIPS AND TRICKS
Don’t overmix your dough, you want a loose dough, this is what helps it stay fluffy and keeps its layers!
Don’t use a rolling pin, pat, press your dough!
Use some yummy add ins, nuts, fruit maybe try some yummy spices!
I realy hope you try these! They are amazing!
8 Secrets on how to make box (pouch) brownies awesome
Box or in my case, pouch brownies always get a bad rep! They are made to be cheap, easy and quick so major food producers whip them out as a add on to an already great line! But this, gives them the terrible feedback they seem to be getting!
I am writing this to convince you, that not all box (pouch) brownie mixes are the same! Small, local companies like Flour and Dough, make ours the way you would at home, with good ingredients, loads of chocolate chips and just the right amount of everything!
These Chewy Chocolate Brownies are made to be chewy, gooey and fudgy and loaded with yummy chocolate pieces, that when baked and melted are still there and not disintegrated into nothingness!
This baking mix, will taste like they came from the best bakery in town, I promise!
If you still don’t believe me, here are a few more tips on how to make your brownie baking mix, better than ever!
1 - START WITH FLOUR AND DOUGH CHEWY CHOCOLATE BROWNIE MIX
This is a easy one, right? Obviously, it’s a blog about Flour and Dough baking mixes, brownies to be exact!
2 -WE USE BUTTER AND NOT OIL
DONT EVER USE OIL!! That’s it, don’t you dare do it!
Butter adds a certain richness and depth to your brownie. Ever had a slice of cake and it left you with that horrible oil taste in your month…think of that when reaching for you oil when trying to make a batch of brownies!
3 - EGGS
Now, being in New Zealand and currently struggling to keep up with the prices of eggs, I know this is a hard one. But don’t replace eggs for something else, use eggs. Use the amount of eggs as suggested on the baking mix, if you really want to add one more, you can, but remember it will need to bake longer and it will be more cake like. Eggs help to give that perfect crack on the top of the brownie.
That look that just screams, professional!
4. DO NOT OVER MIX YOUR BAKING MIX
Now, I have said this before, I say it on the back of the baking mix, don’t do it. It makes the batter dense, thick and just not airy. Your brownie will come out, thick, clunky and hard!
All you need to do is mix until you have no dry parts left, that’s it, now scrape it into your baking pan!
5. COOK THEM LOW AND SLOW
Now this is something that I love to do! Cook them on a lower heat, say 160 degrees C, and then push up the time between 40 and 50 minutes - depending on your oven. This makes them even fudgier! I dont even think that’s a real word, but it works here!
NOW COMES THE PART WHERE I TELL YOU THAT ITS OK TO ADD THINGS - YES IT REALY IS
6. ADD COFFEE
Who doesn’t want a brownie that’s rich and extra chocolaty? Add 1 teaspoon of coffee to a small amount of water, you don’t want to make your brownies watery. Stir it up and add it to the brownie batter.
You know that coffee and chocolate are a match made in heaven, right? Coffee intensify’s the flavour of chocolate, it makes it deeper, richer.
7. ADD MARSHMALLOWS, PRETZELS, PEANUTS,CRUSHED COOKIES, M&M’s….
You get what I am trying to say here?! Add whatever you like, to the batter, even sprinkle some on top! Give it a swirl of peanut butter or my personal favorite some Biscoff!
8. AGAIN, I AM TELLING YOU IT’s REALY OK TO MAKE SOMETHING ELSE FROM YOUR BROWNIE BAKING MIX
Make a brownie cake, tart cups, brownie crust for your favorite cheese cake…this is topic for a different day, but go ahead, experiment and you will be pleasantly surprised!
So go on, have some, get the kids involved and make some awesome memories, and some amazing brownies too!
Keto Pizza - from a baking mix
When I say our baking mixes are versatile, I really mean it!
One bread baking mix can absolutely make you that low carb, gluten free bread you have been dreaming of, in record time. But when you feel like something else and bread is not going to cut it, make a low carb / keto pizza base from our baking mix!
Now you can make your very own keto pizza right at home, so when the craving strikes, you will be prepared!
why you will love it
The best part of a pizza, is the base, you can add your favorite toppings and cheese, but if the base is terrible, your entire pizza is terrible!
This is where this base comes in handy! The Almond flour and other ingredients has already been mixed in the right ingredients for you. It’s healthier than the normal wheat (white ) flour that most pizza bases are made from, and its even gluten free, for those that need it.
It is really easy to make at home, saving you time and money, in this time we find ourselves in, saving money is absolute key!
You can have the baking mix ready in your pantry for months, so you wont even have to leave the house to go and grab some ingredients!
Have a look at the video here, made by the amazing @sezzy_keto, who is one of our very amazing brand reps!
KETO PIZZA BASE
How is that for a keto pizza base!
Sezzy used the Rosemary Garlic and Thyme baking mix for this base as it already has some amazing herbs mixed into it, and in the perfect quantities. The Original bread baking mix will also do the trick, but you will have to add herbs and spices, if you want them in your base!
INGREDIENTS
1 Baking Mix - Rosemary Garlic and Thyme ( recommended)
3/4 cup parmesan cheese
2 eggs
2 tablespoons water ( maybe a little more)
1 1/2 tablespoons olive oil
instructions
1.In a large bowl, combine your baking mix and cheese.
2. In a small bowl/jug mix up your eggs, water and oil.
3. Add the wet mixture into your dry ingredients and give it a good mix, until a nice dough is formed. Make sure you have added enough water. you want it to look like a dough, not crumbly, but all stuck to gether without being sticky.
4. Form dough into a nice ball. Here you need to decide if you are making 2 bases or 1. I prefer to make two, as the dough makes a large size pizza and I like it quite thin, so it became a little tricky to manage.
5. Transfer your dough ball/s onto baking paper, place another piece on top, and roll it out!
6. Transfer your pizza/s to a pzza stone/pan - I use a cookie sheet, that all I had! Bake at 180 for 15-20 mins. You want your crust slightly brown and for me, crispy on the edges. Cool your pizza for 10-15 minutes
7. Now, flip it over, still on the pan/stone and remove the baking paper. Add your toppings here!
8. Give your pizza a nice grill on 220 degrees celsius, until the cheese is nice a bubbly!
tips
Roll out your pizza to the thickness and size you want. I prefer a thinner crust and also a rectangle size. Remember to make your baking paper the correct size
Add your favorite toppings
If you are using the Original baking mix, add some herbs and spices, to make the pizza base your own!
If you are going to use the Original, why not make it into something sweet? Think dessert pizza!
Your pizza can go into the fridge, the crust held, for me, for a day, then I ate the rest, so beyond that, I actualy dont know!
You can prepare keto pizza bases before hand and freeze them! Freeze them in layers in between the baking paper, then wrap them in plastic wrap. Thaw them out before you bake them. I would recommend that you don’t keep them longer than 3 months in the freezer.
Have fun and let us know how your keto pizza from a baking mix, turned out!


