FROM BREAD TO CHOCOLATE BROWNIES - ALL THINGS INTERESTING
Keto Carrot Cake - baking mix
The last few days I have been having a craving for Carrot Cake but not any old Carrot Cake, the specific kind that is slightly healthier and a little bit better for the kids!
I decided to use the trusty Original Bread Mix and turn it into a Carrot Cake - you can make it Keto Carrot Cake pretty easy or leave it as is, both ways are delicious and perfect when the craving strikes!
STORAGE
I made little loaves, ie little Carrot Cakes baked into a mini loaf tin and they were kept on the bench in a container for days. I wont recommend keeping them any longer than that, unless you pop them into the fridge, that should give you a day or two extra!
EQUIPMENT
Nothing fancy other than, some sort of baking tin, a grater and something to mix with!
FREEZER
I am not sure, ours did not make it past day 5, we ate it all, but I do know the Original Baking Mix, once baked can be frozen and I presume the Mini Carrot Cakes will be perfect when frozen and defrosted again! But do let me know if you do freeze them!
INGREDIENTS NEEDED
1 x Original Baking Mix
150g grated carrots
1 teaspoon cinnamon powder
1 teaspoon baking poweder
4 large eggs
1/4 cup sugar - sweetner of choice
150g melted butter
1 tablespoon oil
Melt the butter and stir in the sugar/sweetner. Add all the other ingredients an give it a good mix.
Fill your mini loaf tin 3/4 of the way full and bake on 180 for 15 mins - or until the skewer comes out clean
CREAM CHEESE ICING - SMALL BATCH
4 tablespoons soft butter
4 tablespoons room temp cream cheese
1/4 icing sugar / sweetner of choice
Mix it all together and pipe/spread onto your individual mini carrot cakes once cooled
Sheet Pan Cake - from a cake mix
Who remembers having a cake made in a beer box?
I had one of these at almost every birthday party, so did my friends and so did their friends….and you get the idea here!
I remember the cake as always being vanilla and frosted with my favorite colour at the time and layered with sprinkles! But for the life of me, I haven’t been able to find a recipe or an actual instruction on how to do this. How big is the cake mix, does it get baked in this beer box? Surely, it will need to be super clean or layered with baking paper? Does the box not burn??
Well, I was kindly sent a recipe a few weeks back and I going to try and figure it out, but I am a bit scared as I don’t particularly need to burn down the oven!
So, I figured until I sort this cake mix out, I will use my vanilla cake mix and bake it in a sheet!
Here is what you will need
Vanilla Cake Mix from Flour & Dough - this one is nice a big and makes a good size
or you can buy the complete kit that comes with sprinkles, piping bag, cake mix, nozzle and a FREE GIFT
eggs
buttermilk
butter
water
icing sugar
more butter
sprinkles
You will need some kitchen equipment
bowl
spatula
mixer
baking tins - I used square for this cake 20cm x 20 cm
baking paper - line that tin!
oven :)
STORAGE
Storing for me has always been a problem, i have young kids, neighbours and friends who all know, i always have something here for them to eat!
But, as with all freshly baked goods…3- 5 days in a airtight container and you can stretch it a day or two in the fridge!
BUT - this cake FREEZES beautifully! You have two choices really
freeze it before you decorate it
or freeze it after you decorate it
Either way, let it cool completely, and wrap it in cling wrap and then a layer of tin foil! I like to decorate, then pop it in the fridge for at least an hour and then wrap it, this way you don’t get massive dents and smudges in the soft butter icing!
LETS GET TO IT THEN
Grab all your ingredients
Start by adding the cake mix to your mixing bowl. Give your eggs a good old whip and add all the wet ingredients.
LINE YOUR TIN with baking paper! The last thing you want is this to get stuck!
Add our cake mixture to the baking tin and pop into the oven!
I am going to do a loaf cake next! Any ideas for flavours??
Make up your icing of choice while this is in the oven and once cooled, all you have to do is spread it all over and add sprinkles to the top!
This is my version of the cake in a beer box!
Hope you have a great time baking and sharing your treats!
The perfect scone recipe
I have always wanted the perfect scone recipe! One of those that you whip up on lazy weekend mornings, one that can have some extra’s added to them, or just be plain and have butter and jam on and taste perfect!
I also wanted it to be a baking mix, but then, I wasn’t so sure! I mean, do we need a scone baking mix? It’s one of those things, like do we need another cake mix baking mix? I actualy don’t know. I still don’t know, so I figured I’d share my recipe with you and realy hope you use it!
It’s a little bit long, but honestly, it’s not hard, I get my kids involved in most of the baking, so there you have it, if they can help, then realy you can make it!
It’s made with a handful of pantry staples, loaded with some of your favorite mix ins, or leave it as is! But it’s buttery and flaky all at the same time and realy is the perfect breakfast or tea time snack!
The pantry goods you will need are….
Flour
Baking Powder
Sugar
Heavy Cream or Whipping cream
Egg
Salt
Butter ( cold)
Vanilla (optional)
Dried Fruit ( optional)
Choc Chips (optional)
Blueberries ( optional)
There are a few optional add ins, if you don’t want/have any don’t use them, these are great scones plain!
Baking Sheet
Baking Paper
Mixing Bowls
Fork / Pastry Cutter
Knife
Realy is pretty much everything you will have already!
Let’s get started making your scones!
INGREDIENTS
2 1/2 Cups Flour
1/4 Sugar
2 1/2 teaspoon baking powder
1/3 cup COLD butter
3/4 heavy cream or whipping cream
1 egg
OPTIONAL
1/2 cup dried add ins / mix in
1 teaspoon vanilla extract
Preheat y our oven to 200C and line your baking sheet with the baking paper
In a large bowl, mix together your dry ingredients, flour, sugar, baking powder and salt.
Grate/cut your butter into pieces roughly pea size and if using, add in your add ins. Add this all to the bowl with your dry ingredients. Give it a quick mix.
In a small bowl whisk your egg, your heavy/whipping cream and vanilla. Slowly add this to your dry mixture and using a fork combine this until you have a shaggy clumpy doughy mixture. Turn it out onto a floured surface and press into a 2cm ish high square. Don’t squish it all tightly together, it needs to be loose and shaggy. Cut this dough in half and stack them ontop of each other. Press them down together, so they form one square or round 2cm high. Now you can decide what form you want your scones. I went for round cut into “pizza slices”. If you want traditional round forms, cut them out with a cookie cutter. Or if your looking for squares use a knife and cut them out. When using up your “leftover” dont knead/squish the layers, this is what gives it the flaky, fluffy texture. I realy do recommend you your your shapes so you don’t have any leftovers!
Place scones onto your baking mix and about 2cm apart. Brush each scones with some more heavy cream and sprinkle with some extra sugar! FREEZE them for 15 minutes, this helps your butter stay put!
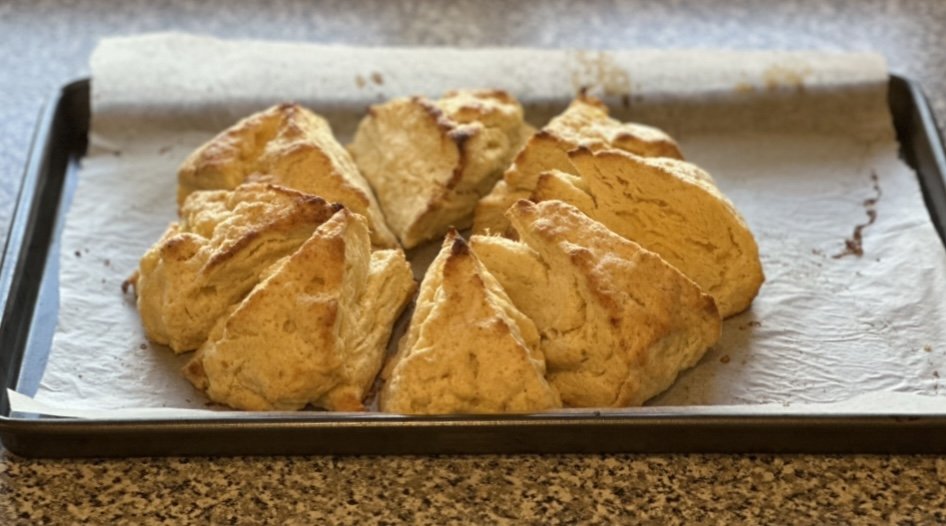
Remove from the freezer and pop directly into the oven for 12-15 minutes! Depending on your size of the scones you cut! Mine, as per picture went 15 minutes!
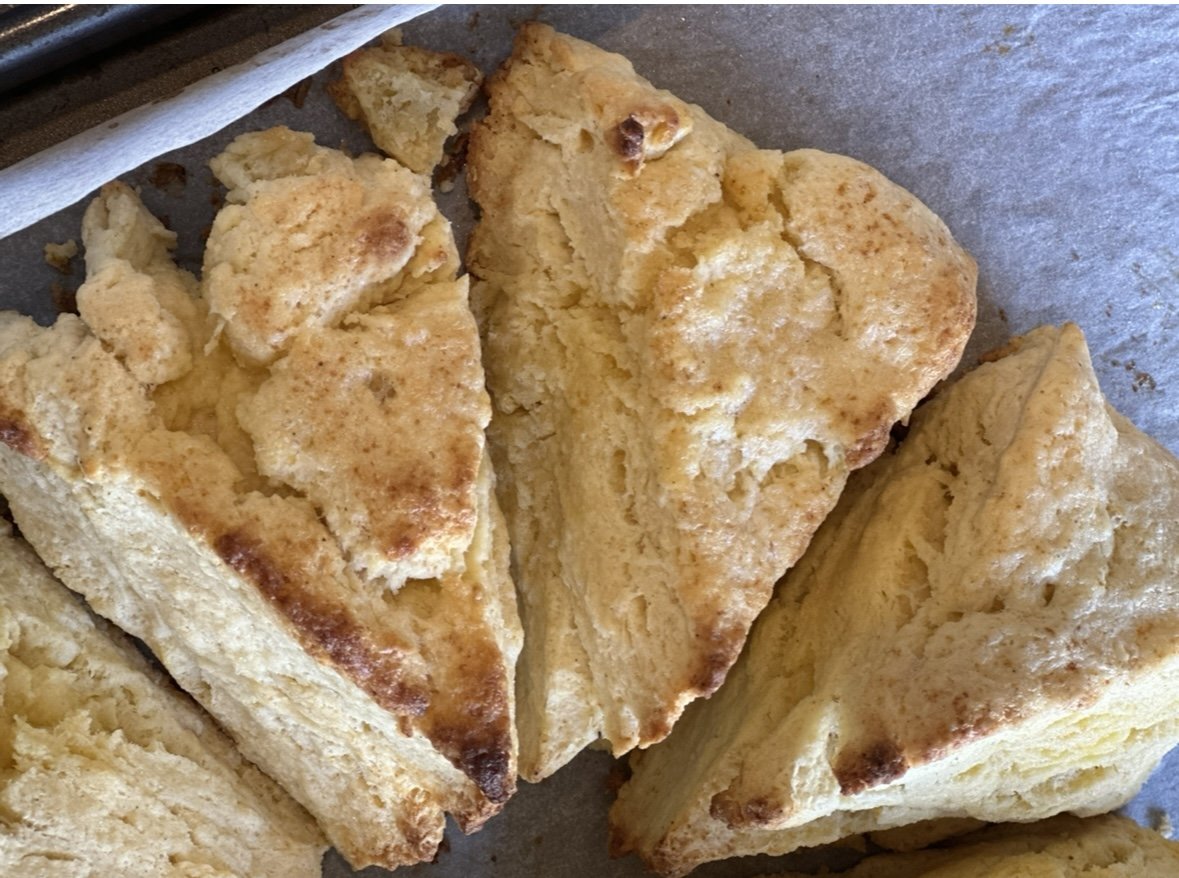
They are done when the have puffed up, the tops are a lovely golden colour! IF they are turning more brown than golden add a piece of tin foil to the top and bake for the remaining time!
These are best eaten on the same day, and are absolutely fine when warmed up for the next 2-3 days! Keep them in a airtight container!
TIPS AND TRICKS
Don’t overmix your dough, you want a loose dough, this is what helps it stay fluffy and keeps its layers!
Don’t use a rolling pin, pat, press your dough!
Use some yummy add ins, nuts, fruit maybe try some yummy spices!
I realy hope you try these! They are amazing!
Keto French Toast - Valentines Day Edition
I love all types of special days! Valentines Day is no exception!
We celebrate as a family, we don’t go out for dinner, rarely, as we don’t have a network of babysitters or any family close by and the kiddos are still a bit young to sit still in a fancy restaurant! They prefer to run amok after the novelty of colouring in has worn off! I wish more places would invest in kids play areas! In the country I was born in, EVERY single restaurant has a play area, and they are AMAZING!! Most of them have wonderful ladies looking after the kids in them too!! Honestly, you can sit and have a glass of wine in peace and quite knowing your children are having fun and you don’t have to wash any dishes afterwards!!! WIN WIN
SO, we do Valentines Day at home, pretty much for the entire day!
Lets start with Keto French Toast for breakfast, shall we!
INGREDIENTS
1 x pouch of Flour and Dough Keto Baking Mix - I used Sunflower Date and Walnut here
1 x egg
Coconut oil, butter, oil for frying
That’s it! Oh, and you will need a pan too :)
TIPS AND TRICKS
Because these loaves are not very high, no gluten, no yeast, they don’t rise heaps! So, I halved my loaf tin, I just added some tinfoil to corner it off! I had a smaller loaf, but it made it allot higher!
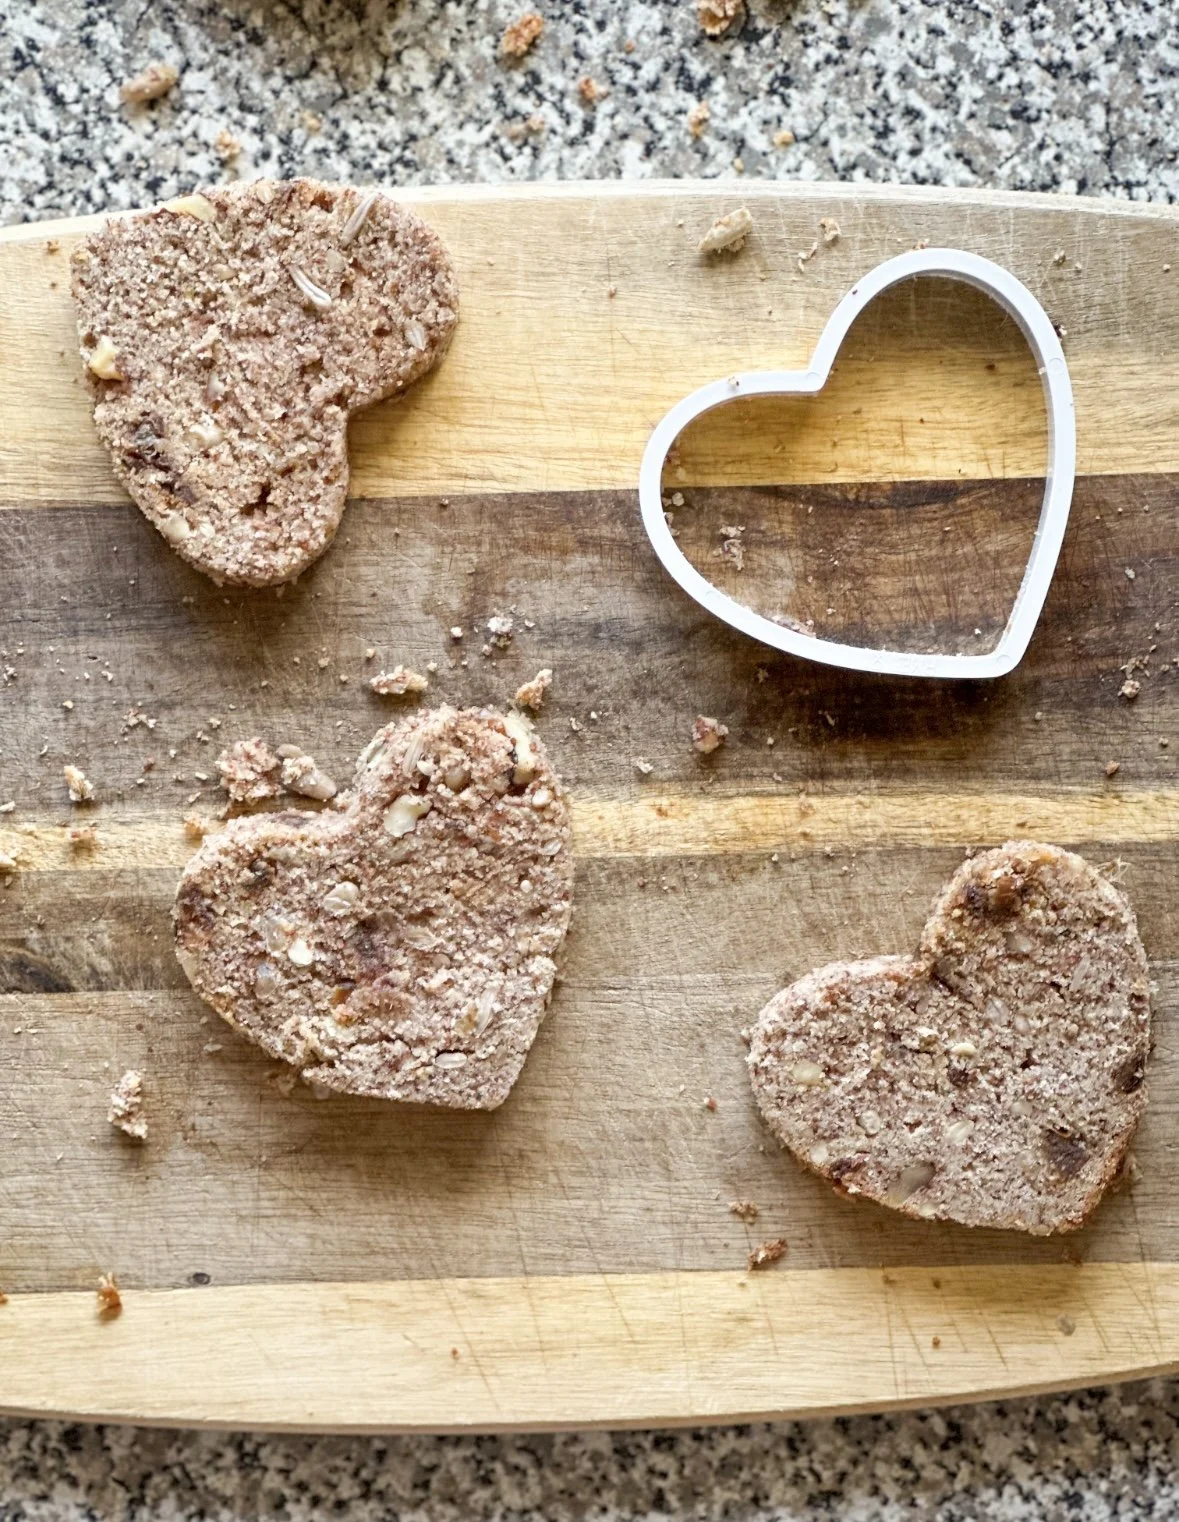
This is a 10 cm heart cookie cutter. I got 8 heart shaped bread slices from this loaf.
Don’t waste your cut outs! I love to bake my extra pieces, tossed in olive oil, and use them as croutons! What would your idea be? I did see a realy cute idea for using crusts the other day! In quick - they roll them up and add one roll to the bottom of a muffin tin, add garlic butter on top, grill it, then add pizza sauce and cheese and grill it again. I do wonder if this would work, let me know if you try it!
STORAGE
I actualy don’t know how long it would last, as we made them and then ate them!
TOPPINGS
I think Bob’s your Uncle here!
I love french toast with chutney and cheese
My kids love it with syrup
Hubby likes to add a fried egg, cheese and tomatoe
But, I can imagine, any fruits, syrups, jams would all be amazing!
METHOD
Make up your bread the way it describes on the back of the baking mix packet
Now, do make your loaf tin smaller, like I explained above
Let your loaf cool down completely and make sure your heart cookie cutter fits your loaf. You could also try cutting it into slices by cutting your loaf through the top and not the conventional way from the sides!
Cut out as many heart shapes as you can, I did flip my heart over to get the most out of each slice and the baking mix!
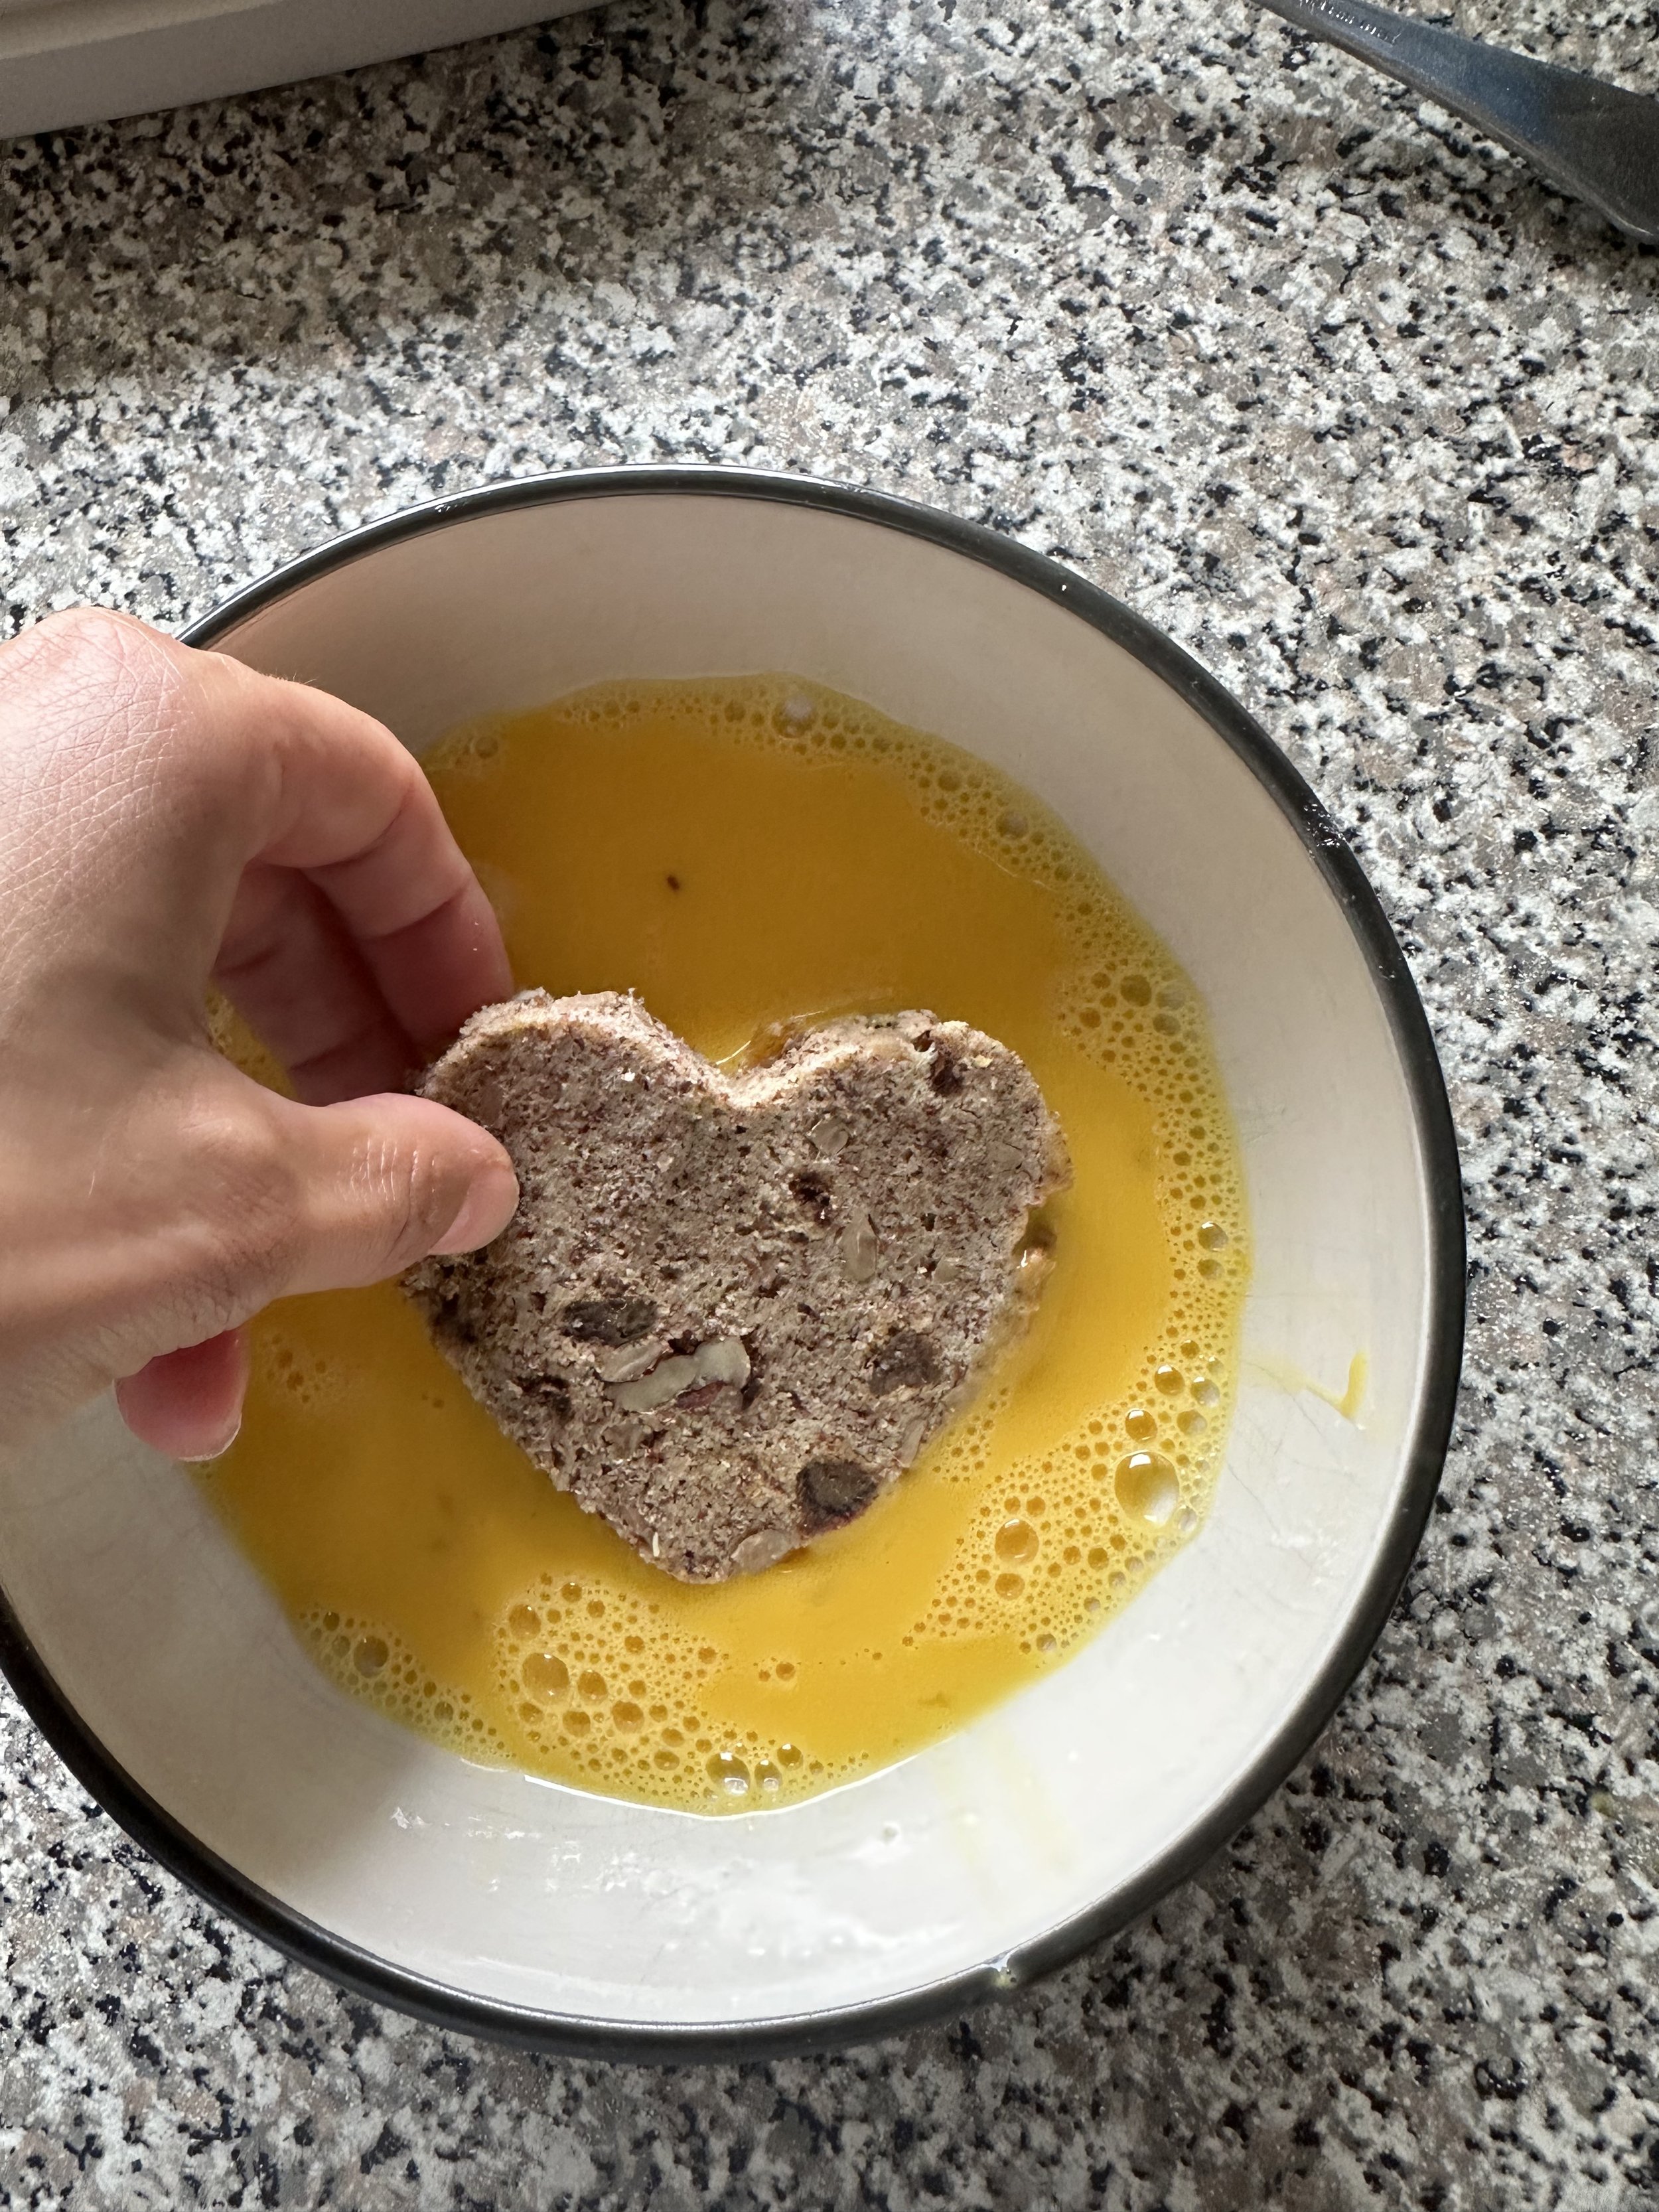
Coat in your egg mixture, and fry until the egg is slightly browned!
Top with your favorite toppings!!
Christmas Crack
When you see a hack, you just have to try it! When it’s this easy, it’s even more of a reason to try it!
My youngest is still at kindy, and I needed to entertain my oldest while at home on his holiday! We got to work!
For all the nitty gritty things, I REALY don’t know how long this will last, I presume the biscuits will go soft after a day or two, but everything should be fine to eat for at least 5 days! Did your even last that long?
We made a cookie sheet full, so roughly 25x35cm, we did share some at swimming with friends, but the majority was eaten at home in record time!
I kept ours in a airtight container on the kitchen bench! It was totaly fine there and tempting everyone when they walked past, so again, finished in record time!
I used Biscoff biscuits, I think there are 24 in a packet….? Not actually sure, so our Christmas Crack ended up breaking, mostly, into biscoff cookie size, which is perfect, as it’s incredibly sweet! I would use the biscoff cookies again, and definitely offset the sweetness with salt flakes on top!
INGREDIENTS
Biscuits of choice - enough to fill the bottom of your sheet pan - mine is 25x35cm and I was short 3 biscuits from a biscoff packet
1/2 cup butter
1/2 cup brown sugar
1 cup chocolate of choice - slab/chunks
Toppings of choice
DEFINATELY SALT
Pre-heat your oven 180C and line your baking pan with baking paper
Add your butter to a small saucepan and melt, once melted add your brown sugar. Let this cook, stirring while it goes, until it has combined. this tends to happen once it reaches boiling point and bubbles for a good 5 minutes.
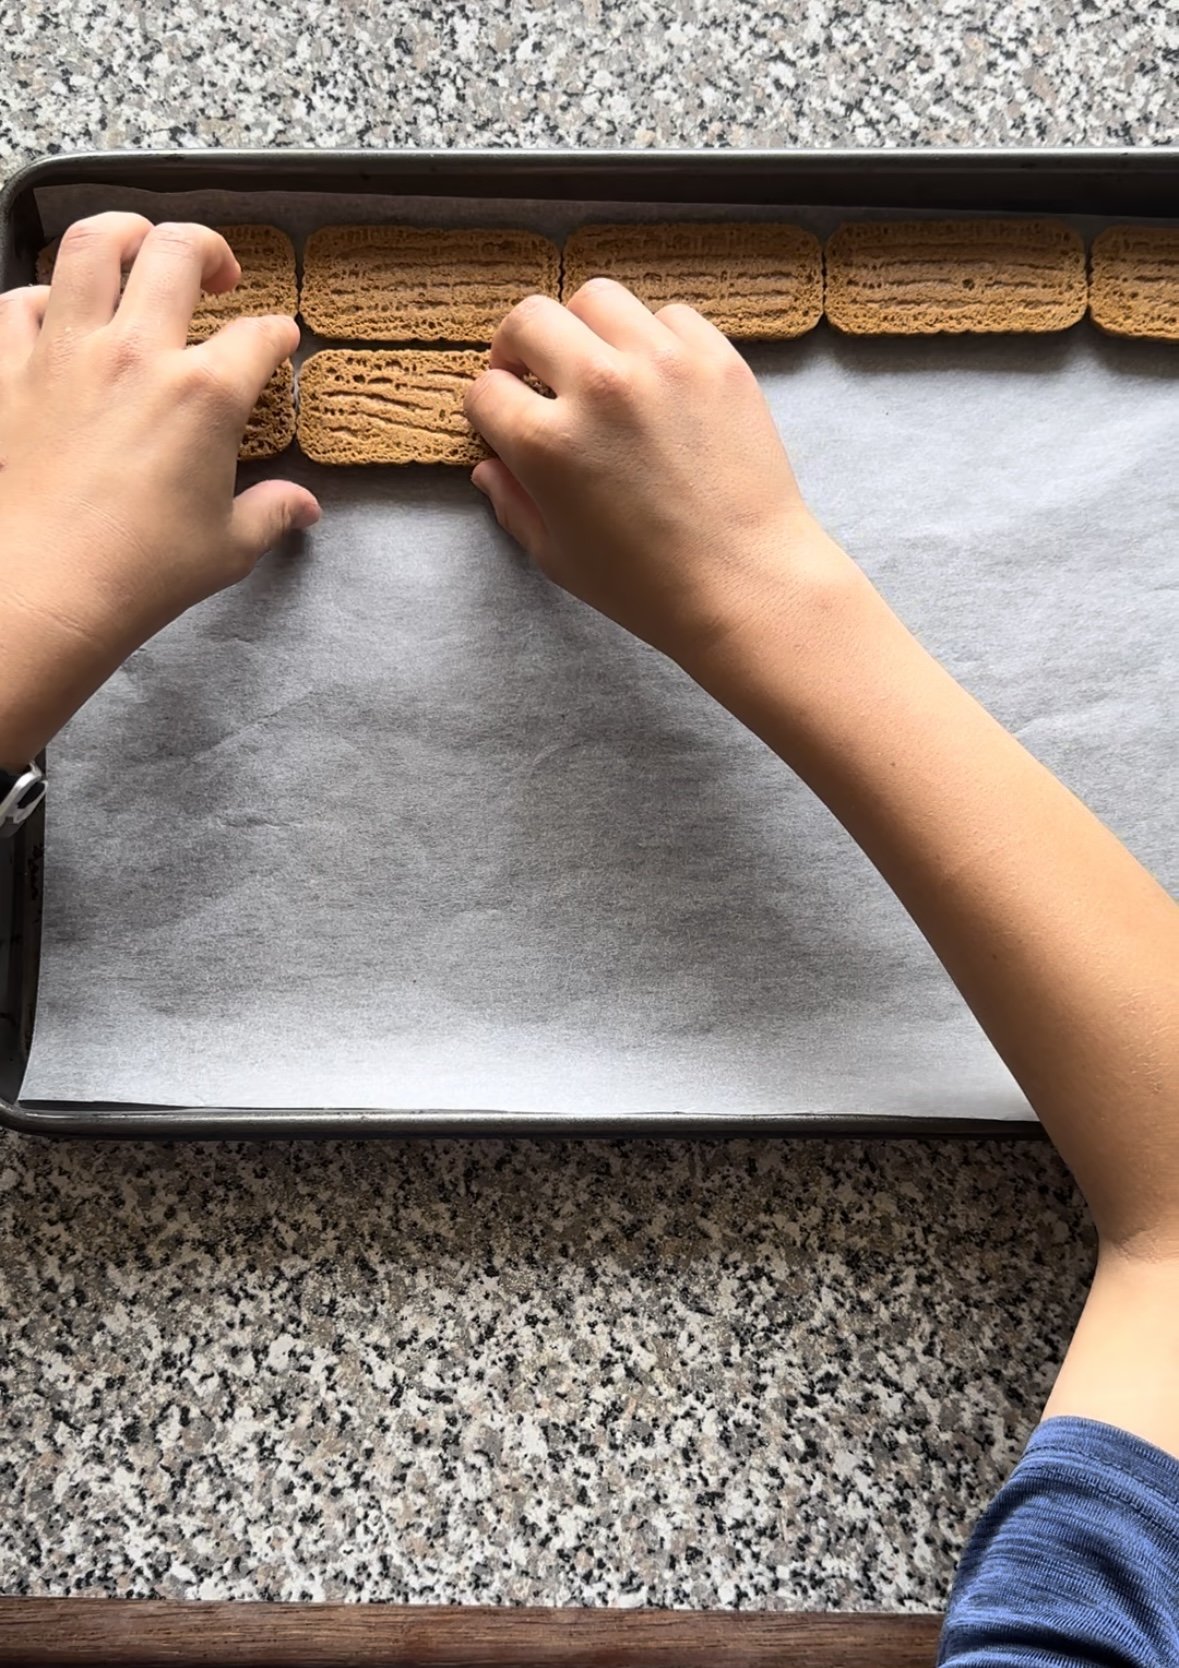
Pack your biscuits all along your sheet, breaking any to fit into the edges if needed. Make sure you have lined your entire tin at the bottom with the biscuit. Now pour over the butter and sugar mixture, its VERY hot, and using a offset spatula or a rubber spatula, spread it over the biscuits. Don’t worry too much, as it tends to spread when you put it into the oven.
Put this tray into the oven and let it bake for 8 minutes. In this time either melt your chocolate, or break your chocolate into smaller pieces, and make sure you have prepped your toppings, cut them, break them, have them ready to sprinkle on top.
Take out the sheet from the oven add the chocolate all over and give it a minute or two and these should start to melt! Once you see the chunks melting, start to spread the the chocolate over the top of the caramel mixture.
If you have melted your chocolate already, give the caramel mixture a minute to cool down, otherwise the caramel and chocolate will mix, and you want to have two layers. The chocolate will set quite quickly, so add your toppings on top as soon as you can, I gave mine a little gentle nudge down into the chocolate and please do add your salt flakes. It’s realy nice to offset the sweetness.
Pop this into the fridge for a few hours. I put mine into the freezer, as we couldn’t wait that long! It took 30 minutes and it was good to go!
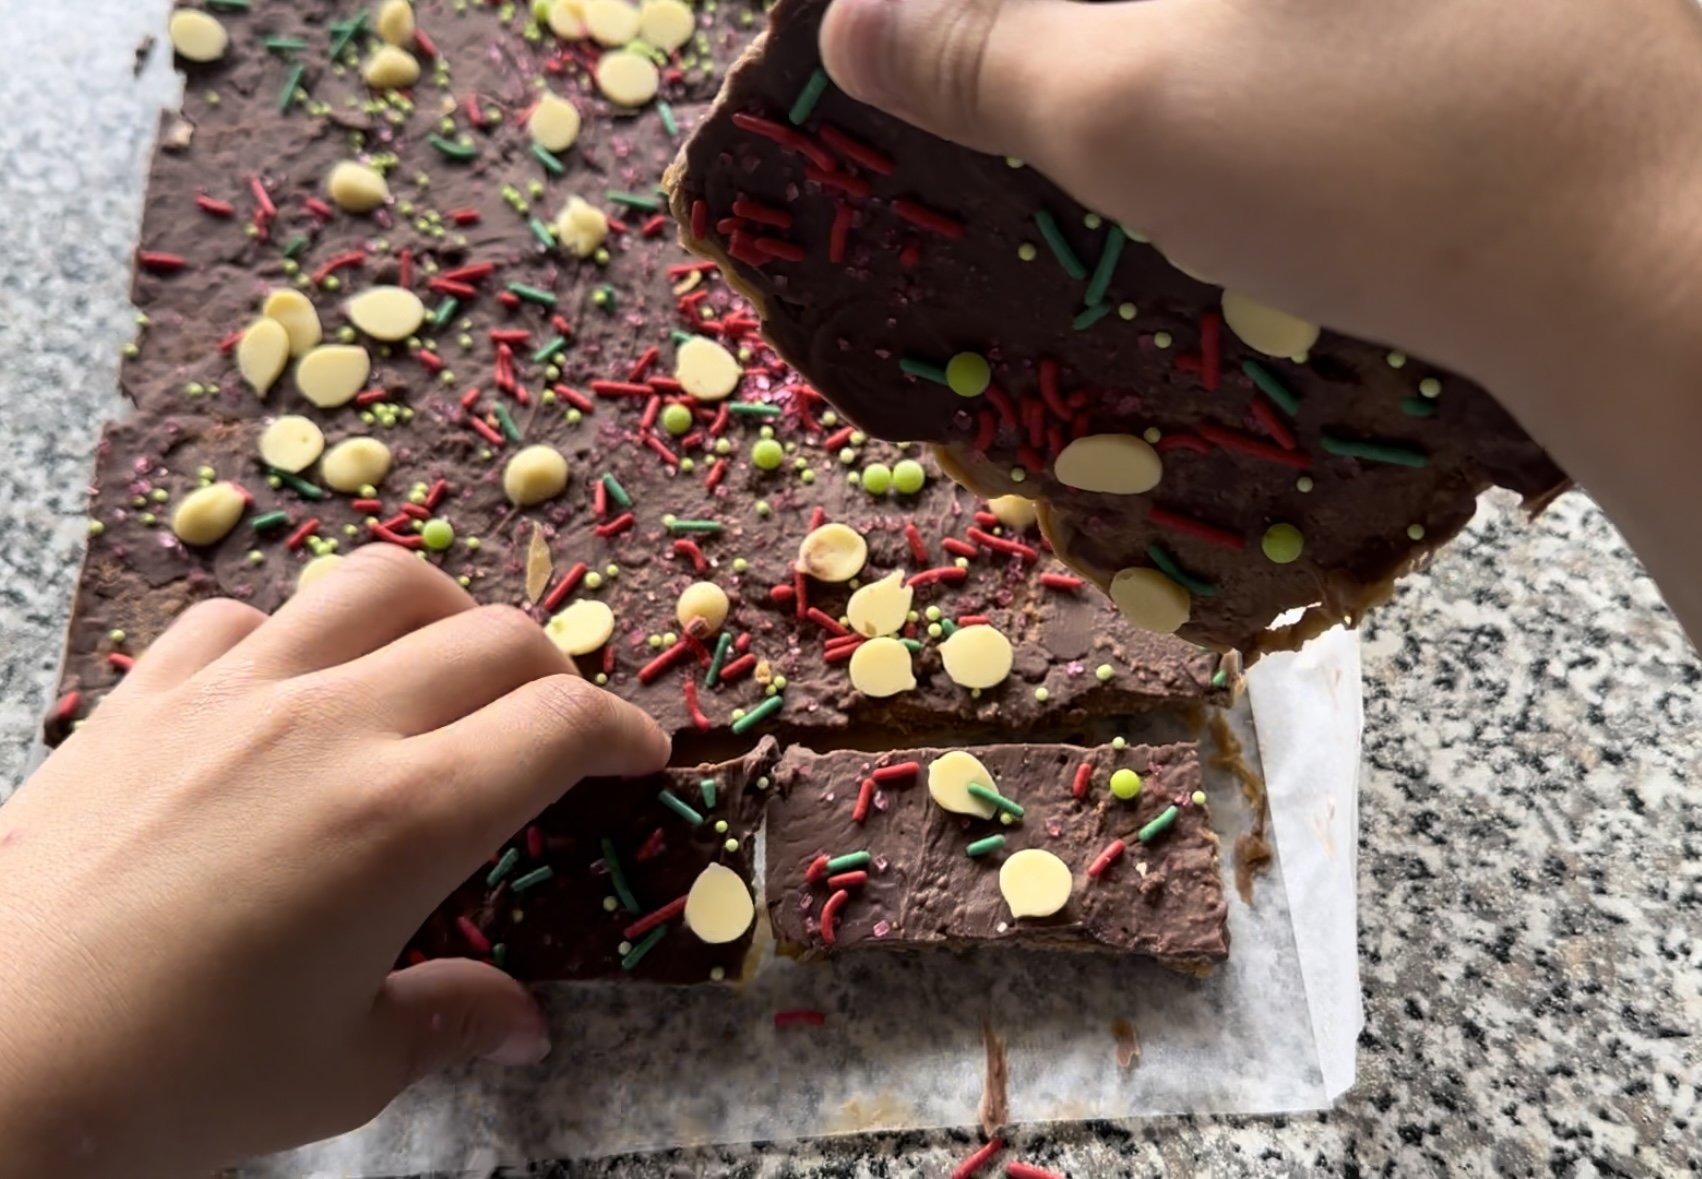
Now break it up as you please, my Christmas crack broke really nicely around each biscoff biscuit.
That’s it! Easy as baking for everyone!
breaking up Christmas Crack
Pretzel Wreaths
In this house, we do festive! The kids love it, we love it and we get to a have a great big mess and absolute fun in between!
These are realy easy to make, you need a handful of ingredients, there realy is no big mess or massive equipment to clean up!
INGREDIENTS
Packet of Pretzel knots
1 Cup Chocolate - white ( to add colour to it)
Sprinkles, decorations
Melt your chocolate in short bursts in the microwave - 30 second did it for me and I stirred until it was nice and glossy! Mix in your preferred colour of choice, I did green and added two drops. I use a gel colour as I just love using gel. But it will work with whatever you have. Give that a good mix.
I put pieces of baking paper down on the table, put the pretzel knots in a bowl, the chocolate in a bowl and put the sprinkles down…and gave it to the kids!
I am sure you can come up with all sorts of exciting stuff, I have seen some realy cute pretzel reindeer! We just did the wreaths and little Maddy, well, she just did some chocolate blobs and tons of sprinkles!
Layered Brownie Cups
Who doesn’t want something guilty but yum! Why not pair both into one delish cup?
Made with some leftovers from your brownie baking mix, or even baked just for this, hey, I’m not judging!
I have made this a few times for the kids, and even once as a dessert for when my parents came over for a visit! It’s always a good hit and does the trick for something sweet after dinner!
STORAGE
This is the part, I can never answer! My kids tend to eat things in record time, except spinach? Go figure!
But, I would think, when making these, you would want to eat them almost immediately as the baked brownie mix, will go a bit soft and soggy if you keep it in between those layers!
Make everything in advance, and then just add them to your glass bowl, or serving containers just before you give them to your friends!
LAYERED BROWNIE CUPS
1 Chocolate Brownie Baking Mix
1 tub of cream
1 packet instant pudding / mousse
1 Tin Caramel
Berries
Mix and bake your brownie baking mix as per the instructions. I made mine in a bigger sheet pan so they baked thinner, and quicker! Let them cool!
Whip up your cream till it’s really nice and stiff! I had a after thought of adding crumbled Flake chocolate or Peppermint Crisp to this cream! ( Peppermint Crisp tart is made this way)
Make your instant pudding/ mousse!
Cut up your brownies into small squares, so they fit in the glass your using, at least a few pieces per layer.
Grab all your ingredients and start layering, this is really up to you and how you prefer!
Once finished put it in the fridge to chill! I had mine chilling for an entire day!
One of our dinner guests mentioned that this would look amazing in a big glass bowl, exactly like you would make a traditional trifle!
KETO CRACKERS - from our baking mix
One of the most looked at recipes from 2023! I wonder how many of you are going to have this on your Christmas platter this year….
When you think of a cracker, for your cheese platter or even a yummy scrumptious dip…what comes to mind?
A sturdy cracker that can handle the DOUBLE DIP, one that can scoop enough dip and a cracker that can withstand the load that your loading onto it! Right?!!
If any of this, rings any bells for you, then this, this is the perfect cracker for you! Guess what, its also Keto! Because I have made it using our Flour and Dough baking mixes! The most versatile mixes ever!
There realy isn’t much to the recipe! You will need 3 tablespoons of butter and some water and most definitely a rolling pin or something resembling a rolling pin…that empty bottle of wine maybe?
I love using them for cheese platters, as they can be cut to any shape you want, ie long rectangle so you can add them to a glass standing all up and pretty, or smaller squares laying flat! However you please, really!
I like to use the Rosemary Garlic and Thyme baking mix, but I have done it with the Pumpkin and Cashew baking mix too! I did, give the nuts and seeds a bit of a bash, with said rolling pin, as I found them a bit thick to roll the cracker to my preferred thickness! But hey, you do you!
EXTRA FLAVOURS
Some flavours I think will be great if you use them alongside the Original Baking Mix - just add them into the mix while mixing!
chilli and garlic spice
smoked paprika
cracked pepper
STORAGE
Store in a airtight container for up to 3 days!
I have never tried to freeze them, but I have frozen the baking mixes when made into loaves, muffins etc I realy dont know if they would be crisp when thawed.
Keto Cracker
Ingredients
1 Pouch - Rosemary Garlic and Thyme or Original Nut Flour Baking Mix or Pumpkin and Cashew
3 TBLS Melted Butter
1/4 Cup Water
Preheat your oven to 170 degrees
Add melted butter and water to the chosen mix and mix until all combined and a dough is formed.
Shape the dough into a ball and then divide into two pieces
I like to roll mine out between two pieces of baking paper, roll out each ball until they are about 2mm thick. The thinner the cracker the crispier and nicer to eat!
Sprinkle some coarse salt on top and give one more light roll with your rolling pin, just so that the salt sticks at the top!
Transfer the baking paper with your dough on top to your baking sheet and bake for 8 minutes. Remove your baking sheet and cut your crackers into squares/rectangles, I used my pizza cutter for this! But feel free to use whatever you have handy.
Turn them around and bake for another 8 minutes, you do want them slightly brown on the edges!
Voila! Keto Crackers from a bread mix!
Use the Original and add your own flavours! Try using the other mixes too! You will need to bash up the nuts and seeds before you try !
Cheesy Garlic Beer Bread Dip
This has got to be right up there on the list of what you make for Christmas snacks! Perfectly creamy and cheesy and everyone will dig in! So make sure you have enough!
I have recently started experimenting with way smaller balls and making double layers of these little balls! So it actualy looks more like a wreath than a big blob like I had it in the beginning!
This dip, has all the amazing flavours of a garlic bread, but in a dip! You can serve it up for the next rugby game or weekend get togethers around the BBQ!
This dip is a game changer!
Its easy to make! Mix the ingredients, make your beer bread and pop in to the oven!
It’s a Cheesy Garlicky perfection! For this dip to be the best it can be, use fresh garlic! You just cant beat it!
Need to make it even better - roast you garlic and thank me later!
INGREDIENTS NEEDED
225 g Cream Cheese
1/4 Cup Sour Cream
1/2 Cup Grated Parmesan Cheese
1/2 Cup Grated Mozzarella Cheese
5 Large Roasted Garlic Cloves ( use to your preference)
Parsley for Garnish
Salt and Pepper
Some Helpful Tips
Use Full Fat Cream cheese - it add to the flavour and creaminess
Use a mixer to add air to your mixture, it creams the ingredients and creates a nice and fluffy texture - much easier to scoop up!
Try adding some of your own flavours - here a few of my suggestions
- 1/2 cup frozen spinach - or finely chopped fresh
- 1/2 Cup sliced jalapenos
- 1/2 teaspoon Smoked Paprika
Beer Bread with Cheesy Dip
1 Packet Beer Bread Baking Mix of your choice ( I used Oregano Garlic Sage and Rosemary)
225 g Cream Cheese
1/4 Cup Sour Cream
1/2 Cup Grated Parmesan Cheese
1/2 Cup Grated Mozzarella Cheese (Feel free to swop these out for any other cheese)
Salt and Pepper to taste
Preheat your oven to 200 C and toss your garlic with some olive oil and roast.
Smash them up finely with a fork.
In your mixer combine Cream Cheese and Sour Cream, and cream . Add your Cheese, Garlic , Salt and Pepper and any one of the extras or all, depending on what you prefer! Mix it all up! And taste it, you have to!
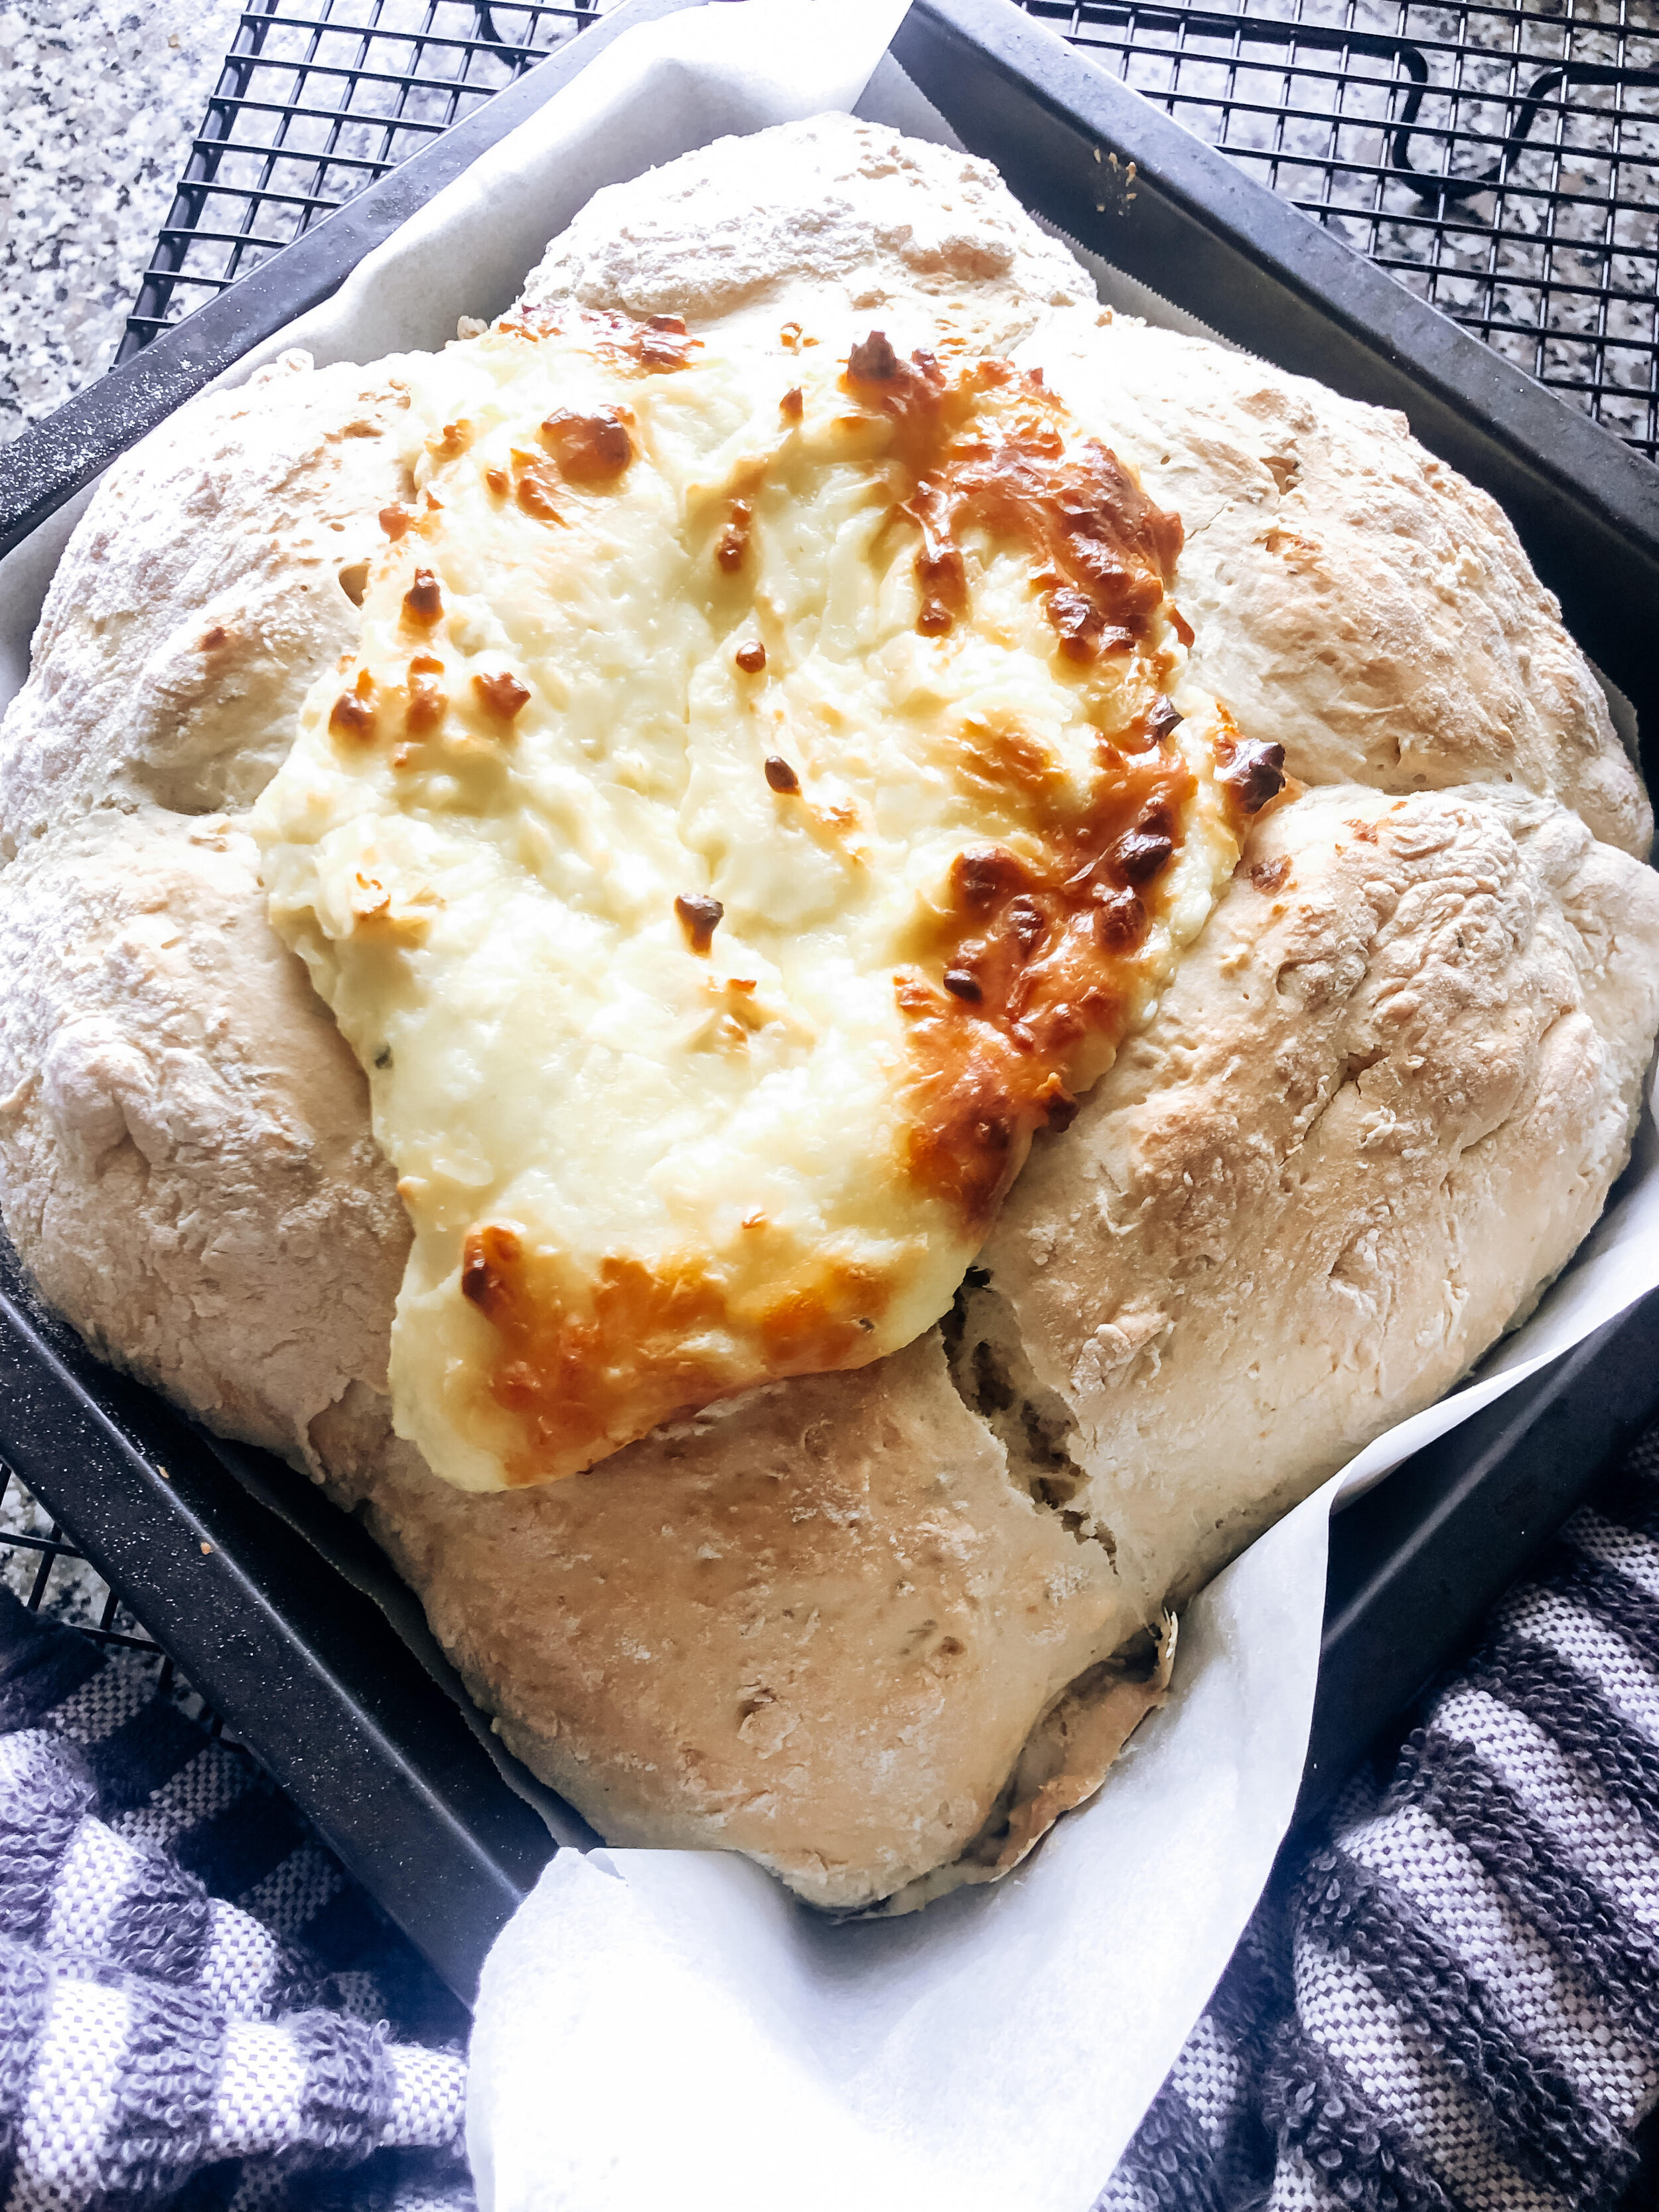
Make the Beer Bread as per instructions on the packet and form into little balls. The mixture is sticky, so keep dusting your hands in flour, I do recommend making smaller balls than the picture! I have also started using two beer bread baking mixes to make a double layer of small balls, so you end up with a wreath!
Cover your baking tin/sheet in baking paper and place your Beer Bread balls on this into a circle, leaving a hole in the middle, roughly 10 cm diameter. ( I use the cream cheese container to guide me here!
Add your Cheesy mixture to the middle of your dough ball ring and bake for 30 minutes!
Add your Parsley as a garnish to the top and pull your little balls off and dip into the cheesy mixture!
LEFTOVERS…
If you have any leftovers the bread will only store for a day or two, warm it up in the oven if you need it a little fresher! The dip will last 4 days in the fridge!
Beer Bread Croutons
Ever have any Beer Bread left over… I know, it doesn’t happen very often! BUT on the off chance you do have some left over, the bread doesn’t tend to hold very long in a airtight container, and who wants to waste!
This is the perfect hack! It lasts FOREVER in the fridge, trust me, I forgot about a container right at the back, and with the kids constantly in the fridge shuffling everything around, somehow I didn’t see it… they were still as crispy as the day I made them!
These are lovely on top of salads, soups and pasta! Do you have nay other ideas?
My oldest actually likes to eat them as is, like a snack! Who am I to disagree!
This is honestly the easiest “cooking” you will do! It takes 10 minutes in the oven and only a few minutes of cutting time, depending on how many slices of Beer Bread you have left!
Beer Bread Croutons
A great way to use up left over Beer Bread, if any, as this bread does not keep very well
Preheat your oven to 200°
Cut Beer Bread into small bite sized pieces and place into oven proof dish - either line your tray with baking paper (easier to clean up), or place directly onto your tray
Toss in a bowl with olive oil and mix until nicely coated
Grill on 200° for 10 minutes tossing once or twice so as not to burn
Take out once pieces are a nice golden brown and cool down completely.
Keep in a air tight container in the fridge
Dried Lemons - the perfect teacher gift!!
Perfect for your next Lemon and Lavender Cake… hint hint - we have the best vanilla cake mix!
These are even more amazing on the perfect cocktail or ice tea … whatever is your preference! 🍹
Another one of my favorite holidays recipes and pre-holidays vibes - I do sample a few new cocktail recipes - just to make sure they taste right!!
There really is no tip or trick to them, the only thing I find is the issue to use baking paper and a tray or straight onto the rack!
I use the oven rack and then cooling racks - however, my oven racks are quite wide and the smaller lemon slices tend to slip through the cracks !
So for these, I do add some baking paper and at about 1.5 hours in, I take the baking paper off, as they just don’t dry out enough! They need the heat and air from all sides!
We have a humidifier - and our light blew, we tried to make grapefruit and lemon slices and no matter how long we had it in they didn’t dry! So, I am definately still going to try that!
If you are looking for the perfect teacher gift or Christmas gift, this is it! I promise your teacher would love to have something she can use to unwind after a full day with kids!
Here you go….
INGREDIENTS
Lemonssssss
Oranges
Grapefruit
Limes
Whatever citrus fruit you have growing in abundance, or choose to use!
Put your oven on 90 C
Slice your citrus thinly, you can add a mixture of all of them, they all dry at the same time. I recommend you TRY and get them 0.5mm and all of them!
A mandolin I would think is your best bet - however, I just slice them with a knife and eye ball the thickness!!
Depending on the size of your lemons - they do shrink - either add them directly onto your racks or add baking paper and then put them onto the racks.
If you are using baking trays, you will need to add baking paper as they tend to get stuck to the tray as they dry out!
Place your racks back into the oven and set time for 1.5 hours. If you can take the baking paper out, do it other wise give them all a flip and return for another 1.5 hours.
After the times up, remove the ones that are done, dark caramel brown. Return the ones that are still yellow, sticky and just not done! Give them 30 minutes at a time extra.
Let them cool down completely and store them in a airtight container! I store mine in the pantry in a plastic container.
Bottle them up in a nice glass jar and if you have some extra crafty tools, add a nice little sticker to the front for gifting and do pair it with a baking mix! The perfect teacher gift!
Crumpets / Flapjacks / Pancakes
Gosh… these are called all sorts of things in all parts of the world!
But, in short , small, fat little circles of absolute delicious-ness made to taste just like a pancake but topped with something different!
I saw this hack… and I had to give it a try!!
With the holidays coming up, I thought Id start to share some of the things I do, with my family to make life easier and more yummy! Christmas for us is about taking it easy and eating waaaay to much!
TIPS and TRICKS
You realy need to use a small tray to freeze these in, remember the entire “hack” is about saving time and because you are frying straight from frozen, they need to be small to actualy cook properly!
Ice cube trays actualy work the best, however, I threw a load out the other day and the rest where filled with ice!!
To save space, once frozen pop, them out and store in a zip lock bag back in the freezer
Keep your heat low - if not you will burn the bottom and still have a frozen middle
STORAGE
Store in the freezer in a closed container - zip lock bag for 1 month. That’s how long I did it, and they are fine!
INGREDIENTS
2 Eggs
1/2 Cup (125ml) Sugar
1 Cup (250ml) Milk
2 T (30ml) Melted Butter
2 Cups (500ml) Cake Flour
4 Teaspoons (20ml) Baking Powder
1/2 Teaspoon (2.5ml) Salt
1. Beat the eggs and sugar together. Add 125 ml (½ c) of the milk and the melted butter, margarine or oil.
2. Sift together the flour, baking powder and salt and stir or beat into the egg mixture.
3. Gradually stir in the remaining milk to form a smooth batter.
4. Spoon into freezer proof containers - Ive just used a silicone muffin tray, add some chocolate chips and/or fruit and pop in the freezer!
5. Cook on LOW heat and once melted turn over!
6. Serve with your favorite topping!
🍩 My FAVORITE chocolate Ganache receipe 🍩
Ganache is one of those best kept secrets that seriously should not be a secret!
It’s a two ingredient secret weapon thats heated and stirred until it’s silky and smooth and an amazingly beautiful rich colour!
It’s not only quick and easy, just as I like it, it’s uniquely versatile.
Its perfect for layering in between cake layers, covering cakes, cupcakes and donuts! Using it as a dipping sauce ( strawberries anyone)for churros and even sugar cookies! It works amazing to pour over brownies and ice cream or even your christmas pavlova! It’s an endless list of what you can do!
Like I said- chocolate ganche should not be a secret and most definately a receipe in any households arsenal!!
I know there are allot of receipes that tell you to use certain chocolate chips and certain chocolate for ganache. I have never had a problem with any chocolate I have used. I do tend to use a chocolate that I love!
For this I used a Nestle Milk Chocolate and normal pouring cream.
The only “issue / difference” that I find is when I used a chocolate chip/ compound it doesn’t always melt as thoroughly as others.
Tips and Tricks
if your chocolate doesn’t melt all the way through after you added it to the cream - I prefer to give it a quick whizz with the hand blender and being careful not to incorporate any bubbles
Chop your slab chooclate into smaller pieces - this helps it melt easier
Cool the ganache considerably before you use it to pipe onto cakes/cupcakes
Let the chocolate and warm cream sit for a few minutes after you have added them together- the warm cream starts melting the chocolate
Chocolate Ganache Receipe
For me, I prefer to keep it to the basic 2:1 ration! 2 parts chocolate and 1 part cream
80g cream
160g chopped chocolate
To cover a large bundt cake ( as pictured below)
warm your heat proof bowl in the microwave ( dont ask why as you warm the cream in this bowl to - this is just how Ive always done it)
Add your 1 part cream ( this video I used 80g) so add 80g cream and warm it up - 1 minute will do
Add your chopped chocolate ( again this video) 160g of chopped chocolate or your chocolate chips
Let it sit for 30 seconds and start to stir, be careful not to add bubbles or stir vigorously! ( you can see I did not follow my own advice here as I was in a hurry!) It will combine!
Stir slowly and before you know it the chocolate and cream will have combined
Let it cool slightly before you use it - I like to start using it for cakes ect when it looks like a peanut butter consistancy
Cake mix used for this Chocolate Bundt cake is the very same Cake/Cupcake Mix that is used in the Cake Kit!
Easy Loaded Garlic Dip
SO, if you know me, you know ME! I eat everything with a sauce or a dip, otherwise what’s the point?
Its the easiest and quickest appetizer for entertaining with your freshly baked beer bread and turns into the greatest crowd pleaser of all time!
It truly is a dip that you should have everything in your pantry and can whip up in 5 minutes or less! Now thats my kinda cooking and the way I intended Flour and Dough to be! Beter yet, if you don’t have the exact ingredients at home, open your fridge and pantry, have a look around and
I promise you will find something in there that will work just as good!
Loaded Garlic Dipping Oil
Here are the ingredients for this Loaded Garlic Dip and then I have added some variations of this specific dip that I have done and tried! I’ll make sure to capture some photos next time and add some more post about them!
Run down of the Ingredients list
Olive oil - I have just used whatever version I have in the cupboard at the time I need it
Balsamic Vinegar - again, I have used whatever version I have available
Garlic Cloves - I have used fresh cloves chopped up and some roasted ones
Parmesan Cheese - I use ready grated cheese here but feel free to grate
Fresh Herbs - I use whatever herbs I currently have growing in the garden
Salt & Pepper - to taste
Tips & Tricks
It will last about a week in the fridge in a airtight container, so feel free to make more. However, we end up finishing it!
Use a flat/shallow dish, so when you scoop you actually get a bit of everything and the oils don’t separate way down to the top and way down to the bottom!
I like to use my salt with a of a heavy hand, it helps bring out the flavours when adding to the beer bread baking mix. Make sure you taste yours!
Make sure you try some of these variations …
Pesto Bread Dipping Oil
Chilli Bread Dipping Oil
Sundried Tomatoe Bread Dipping Oil
Olive Bread Dipping Oil
I’ll update these link as soon as I have the photos ready!
Great, now this is what your here for…the Recipe
Loaded Garlic Bread Dipping Oil
1/2 cup Olive Oil
5 Roasted Garlic cloves
4 Crushed Garlic Cloves
1/4 Cup grated Parmesan Cheese
2 Sprigs Fresh Chopped Rosemary/ or other fresh herbs
Salt & Pepper
Mix it all together in a dipping bowl of choice / preferably a flat dish and add some salt and pepper to your liking!
Serving Suggestions
You have to use our Oregano Garlic and Sage Beer Bread, or if you prefer a tad spicier - Chilli and Garlic Beer Bread will do the trick!
Find yourself with some leftover dip? Fear not, I have tossed it through a crunchy salad the next day for lunch and served it over plain cooked pasta with some added shredded chicken! Delicious both ways!
Comment down below if you have made it and what variatons yo have done!!


